How to Tag Your Video Viewers in Your CRM or Email Platform in ClickFunnels
Tagging is not available on the Free plan, to gain access you will need to upgrade to any of our paid plans!
You will need to set up a Zapier integration in order to tag your viewers. More information here: https://help.vidalytics.com/en/articles/1370747-how-to-set-up-the-zapier-integration
To be able to tag your users in your CRM or email platform based on how long they watched your video, you'll need to perform a couple of extra steps in ClickFunnels, modifying not only the code on your video page, but also the opt-in one.
Follow the steps below, and you should be good to go!
In Vidalytics
- Go to your video settings, create your Video Tag and grab its ID.
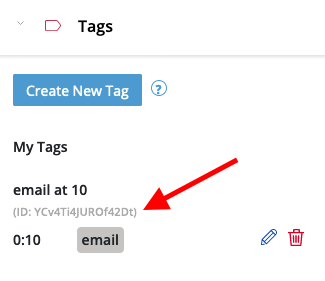
The field tag must match identically to what your CRM calls it (e.g. if they call it contact_id or email
you must put that into our system exactly). You may be able to choose from more than one field over there,
but it must be unique. The typical ones are email address (only one person can have the same email address)
and contact id (or some variation of what your CRM calls contact id).
-
Confirm your changes by clicking the "Publish" button on the top-right corner.
-
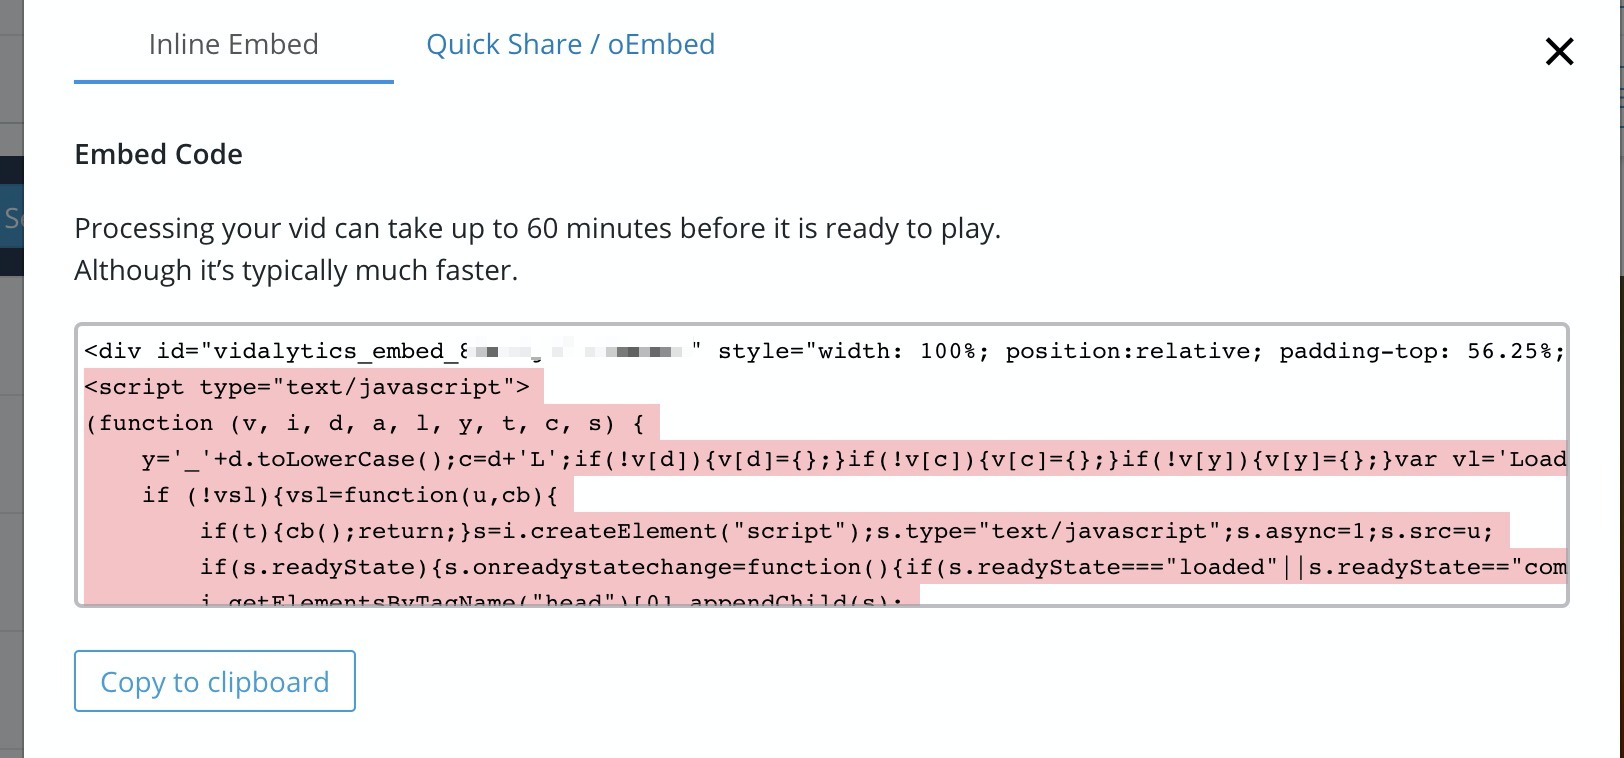
Grab your embed code and keep it handy to paste on your video page later.
Opt-in Page in ClickFunnels
Once in ClickFunnels, you'll need to add a piece of code to your page's footer, but going to the page inside your funnel, clicking on Tracking Code > Footer Code.
Paste this code there:
Click 'Save' and move on to your video page.
Video Page in ClickFunnels
Here is where your video will live, and where your viewers will go after opting into your funnel.
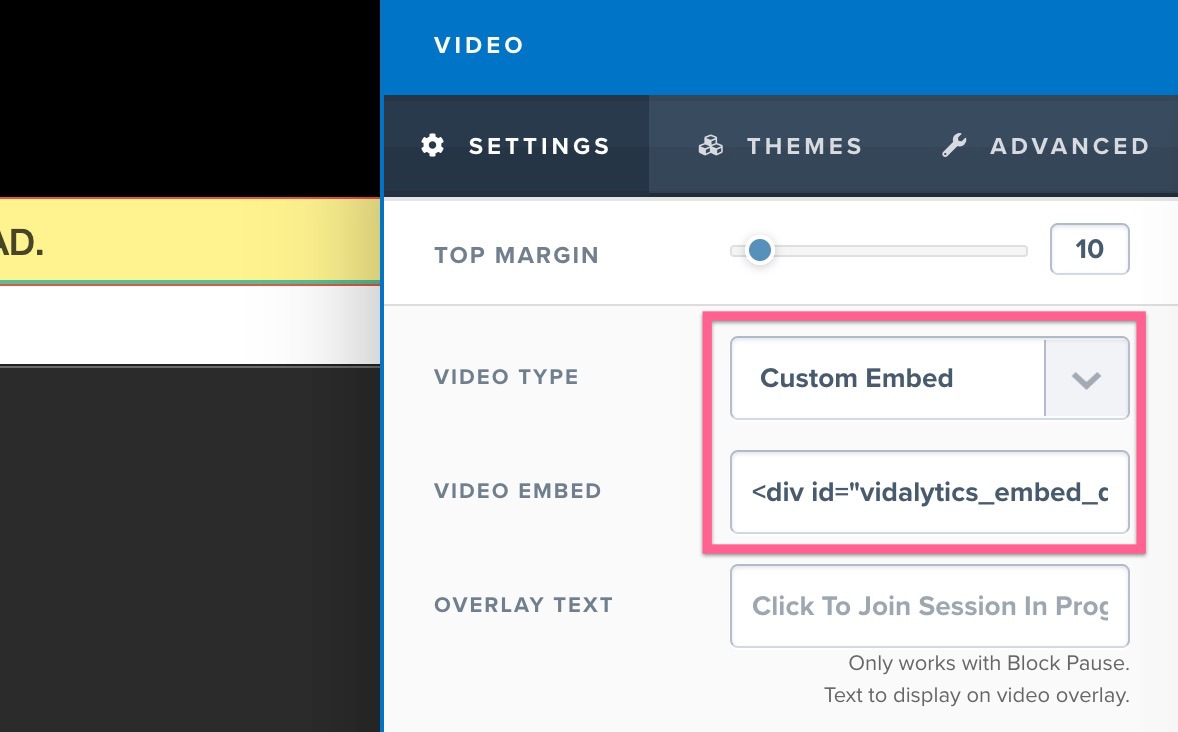
Here is where you'll use the video embed code you grabbed from Vidalytics.
- Grab the first line of your embed code and paste it into your Video Element. The first line will be like this (but with your own video embed ID):
Your video element settings in CF should look like this:
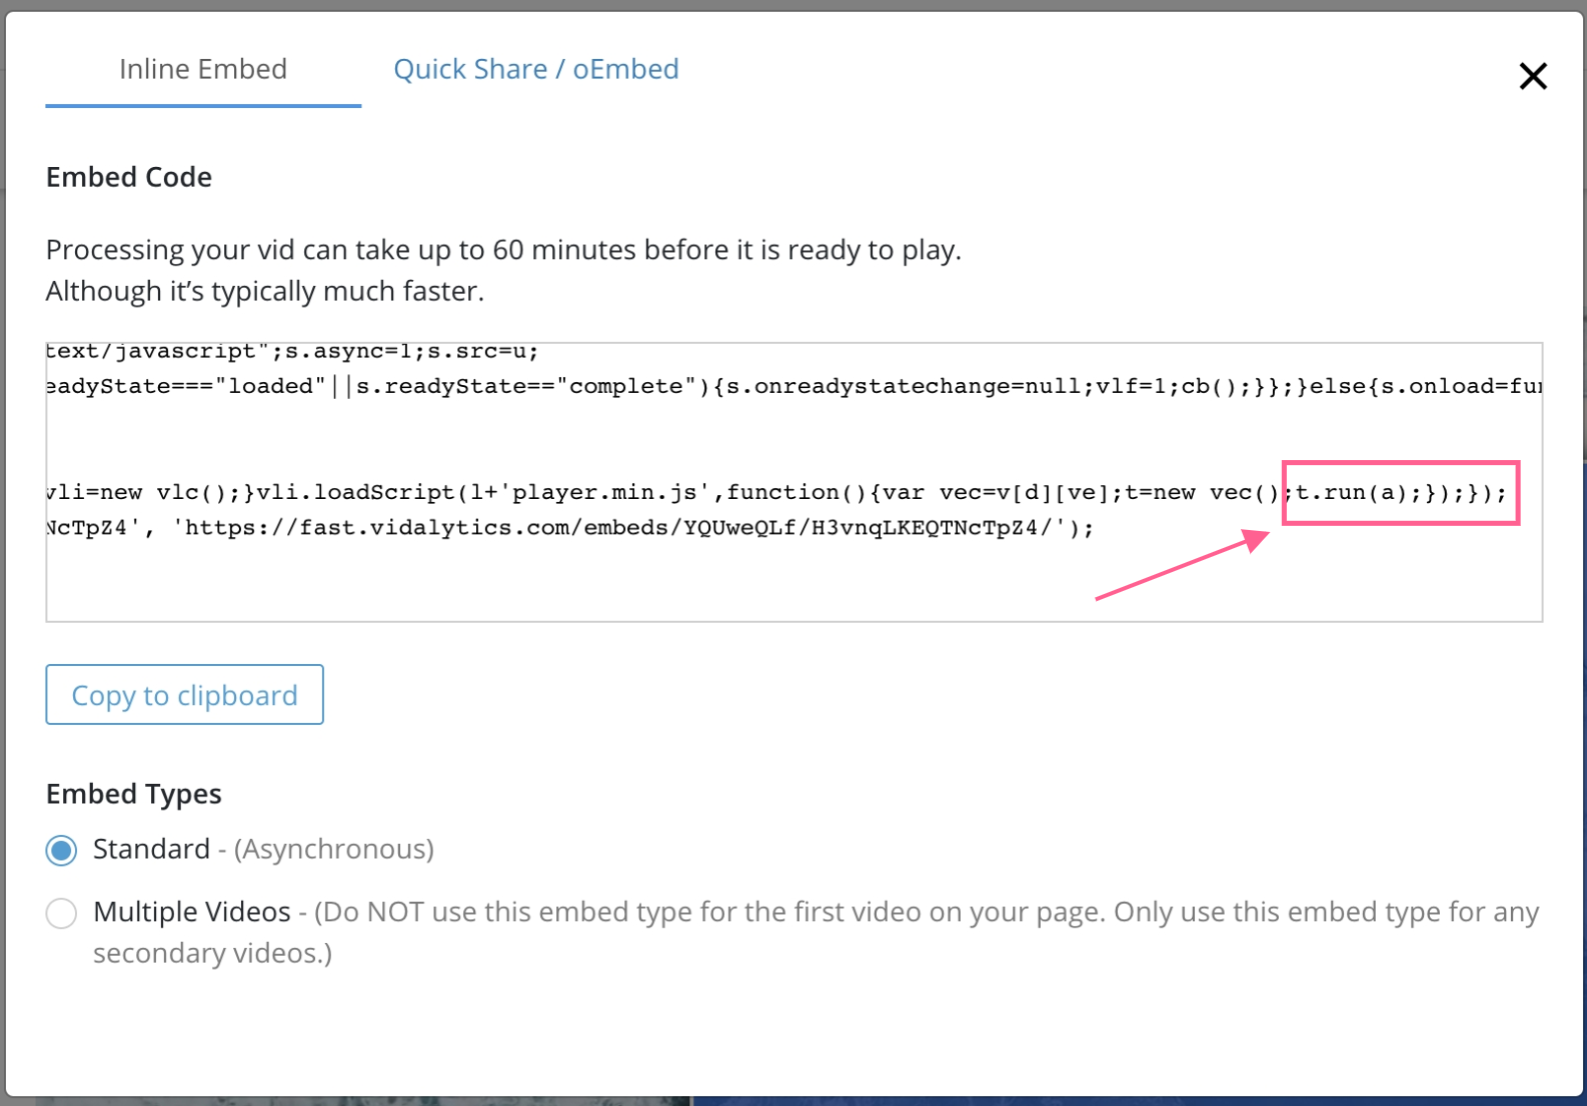
- Paste the following code in your footer, by going to Tracking Code > Footer Code:
If you have two tags, the first half of the code needs to look like this:
The first half of the code, up to the first </script> is custom code that is using the email you collected
in the previous page to tag the viewer. In this portion, replace YOUR_TAG_ID with your IDs, which you grabbed earlier in Vidalytics.
The second part of the code is the rest of your embed code below the first line:
In this portion, don't forget to replace USER_ID and EMBED_ID with your own values taken from the
embed code. Also, t.run(a) in the end of the embed code has to be replaced with: t.run(a, vidalyticsCustomSettings):
After you're done setting the code up, save your ClickFunnels page, and you should be good to go!
In order to test
Tags have a mechanism that prevents them from firing twice for the same video in the same session.
This should not affect your viewers, as they will most likely not submit the same opt-in form twice (even with different emails). However, this will most likely be the case when you are testing your funnel.
The correct procedure to test your setup will be:
- Make sure that your browser local storage is cleared for your domain before you start testing
- Fill in and submit your opt-in form
- Unmute your video and watch it up to the point where your tags should fire
- Check your CMS Dashboard
- Your test email should appear in the correct list, and tagged (usually) within 5 minutes
- If you want to test your opt-in form with a new email, please clear your local storage first (back to step 1)